Measure / Mix / Pour:
- Step 1: MEASURE. Pour equal parts each of resin and hardener into separate clean, unwaxed disposable paper or plastic...
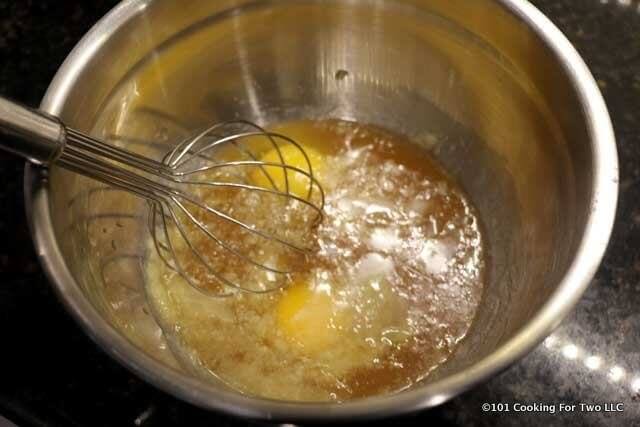
- Step 2: MIX.
- Step 3: Pour. Pour Glaze Coat IMMEDIATELY onto the center of the surface to be covered.
- Step 4: Surface Bubbles.
- Step 5: Curing.
- Step 6: Cleanup.
- Step 1: Measure. Pour equal parts each of resin and hardener into separate clean, unwaxed disposable paper or plastic cups or tubs. ...
- Step 2: Mix.
- Step 3: Pour. Pour Glaze Coat IMMEDIATELY onto the center of the surface to be covered. ...
- Step 4: Surface Bubbles. ...
- Step 5: Cover Project. ...
- Step 6: Curing. ...
- Step 7: Cleanup.
How do I get Started with glaze coat?
• It is recommended that you become familiar with Glaze Coat by doing a small project first. • Keep dust away for approximately eight hours after coating. This can be accomplished by having a dust cover ready to use after pour to prevent debris from falling on project.
Can you mix different types of glaze?
You can mix different types of glaze by layering or blending. Some glazes are not compatible. This can cause blistering, crawling, and flaking. The mixed glaze may also be less stable and prone to leaching. These problems are less likely if you are mixing glaze from the same manufacturer and range.
Can I use glaze coat on wood?
• Wood surfaces: since most woods are porous, seal the surface with a thin coating of GLAZE COAT®applied with a squeegee to help prevent air bubbles from forming while the main pour is in process. • May damage finished surfaces. Avoid such contact until completely cured.
How do you fix bubbles in glaze coat?
Certain woods with open grains such as oak and walnut will allow air to escape causing bubbles. Porous fabrics or papers should follow these steps as well. These applications require a thin coat of Glaze Coat prior to the full flood coating. Mix about ¼ the amount normally used for a full flood coat and spread it thinly over entire surface.
How do you mix epoxy glaze coat?
This easy-to-use, 1:1 ratio is ideal for household and craft projects - just one pour equals 70 coats of varnish. This ultra-clear, high gloss finishing epoxy is ideal for home improvement and craft projects. Preparation Before Mixing: Surface must be dry, sanded and free from dirt, dust, grease, wax, or oil.
How do you glaze a coat on wood?
Pour Glaze Coat IMMEDIATELY onto the center of the surface to be covered. Do not allow it to “sit“. You have about 15-20 minutes working time before product begins to harden. Spread the mixture over the area with a plastic spreader, plastic squeegee, notched trowel or brush.
How thick can you pour glaze coat?
1/4"Glaze Coat should not be applied thicker than 1/4" or it may overheat and burn itself and turn yellow. For pouring the epoxy over these bottle caps, use a dam or railing/edging around the project to keep the epoxy on the surface and in place.
How long does it take for glaze coat to dry to the touch?
Glaze Coat will fully cure in 72 hours. An additional 1 - 2 coats may be applied after 4 - 5 hours. A third coat can be poured after 24 hours but no longer than 48 hours. If applying in an area where dust or other particles are present, temporary cover or protection may be desired.
How do you make a wood glaze?
1:424:40How to Make Your Own Furniture Glaze in Any Color - YouTubeYouTubeStart of suggested clipEnd of suggested clipAnd obviously you can always add more if you need to. But start with about four part glaze to oneMoreAnd obviously you can always add more if you need to. But start with about four part glaze to one part paint. All our glaze is including the pre tinted ones tiger's eye smoky quartz and graphite.
Is glaze coat the same as epoxy?
Famowood Glaze Coat is a pour-on epoxy coating. This ultra-clear, high-gloss finishing epoxy is ideal for home improvement and craft projects. Just one coat equals 60 coats of varnish. Glaze Coat is great for coating tables, bar tops, preserving pictures and photographs or imbedding items such as coins or rocks.
How long before you can sand glaze coat?
Keep dust away for approximately eight hours after pouring. This can be accomplished by having a dust cover ready to use after pour to prevent debris from falling on project. If a second coat is required, cover project and allow to cure approximately 4-5 hours at 70 °F before applying second coat.
Can you do two coats of glaze coat?
Yes, you can apply a second coat of resin if you need to fix a mistake or a surface imperfection. You can also pour multiple layers if you need to cover areas of high relief, if you're pouring into a mold or if you simply like the look of a thicker coat.
What happens if you pour resin too thick?
If your epoxy pour is too thick, the reaction can create too much heat, resulting in a product that does not cure properly with cracks or excessive bubbles. You can pour the next layer after the previous pour has gone through its heat cycle, which is usually around 24 hours.
Is Famowood glaze coat self leveling?
Glaze Coat is self-leveling. Spread the mixture over the area with a plastic spreader, plastic squeegee, notched trowel or brush.
Can glaze coat go over polyurethane?
To coat over polyurethane or acrylic finishes, lightly sand the surface and wipe with acetone or alcohol before using Glaze Coat. To catch drips, cover surrounding area with waxed paper or drop cloth. Allow drips to flow freely off the sides by elevating area to be coated.
How do you glaze coat table top?
0:044:34Epoxy Resin Super Glaze table top - YouTubeYouTubeStart of suggested clipEnd of suggested clipTable. This is Park super glazed I got it at Home Depot. You're. Also going to need a stir stick twoMoreTable. This is Park super glazed I got it at Home Depot. You're. Also going to need a stir stick two to three mixing cups gloves. Hair dryer or heat. Gun.
Mixing Glaze
Use a ratio of 1 part paint to 4 parts glaze to make a basic formula for most faux painting processes. You can use flat or glossy paint and have the color mixed by your paint supplier, or you can mix your own colors using the techniques described in the next section.
Making Your Own Colors
For faux finishing projects with multiple coats, buying premixed paints can get a little pricey. In these cases it may be worth the effort to make your own paint colors for mixing with the glaze.
Tinting the Paint
To mix colors, add some paint to a mixing pail and then add the tint to it a little at a time to "sneak up" on the color you want. Stir well after each addition of tint making sure to scrape the sides of the pail to mix in any strays. Keep stirring and scraping until you have a uniform color without any streaking.
Choosing Your Colors
When choosing a color for a room, the accepted rule of thumb is to use light shades in small rooms and darker ones in large rooms. The resulting effect is to make a small space seem larger with the lighter tone and the large room to feel cozier and warmer with a dark one.
Preparation for Glaze Painting
Good preparation is important to getting the effect you want with a faux finish. First, evaluate the surface you will be working with. Any surface is ready for painting as long as the existing finish is sound with no damage or loose, peeling paint.
Base-Coating
After any necessary repairs are done the first step to the decorative painting process is the application of a base coat of paint. The best base coat for most effects is an eggshell or semi-gloss paint. Alkyd or latex paint can be used here, but in most cases latex is the best and easiest choice.
How to Do Faux Painting
Below is a list of faux painting techniques and the basic process for each. Most of these include a link to a tutorial with instructions for creating these finishes yourself.