How do you take apart a Bissell ProHeat carpet cleaner?
- Push down on the latch to lift out the water tank and the recovery tank from the base of the carpet cleaner.
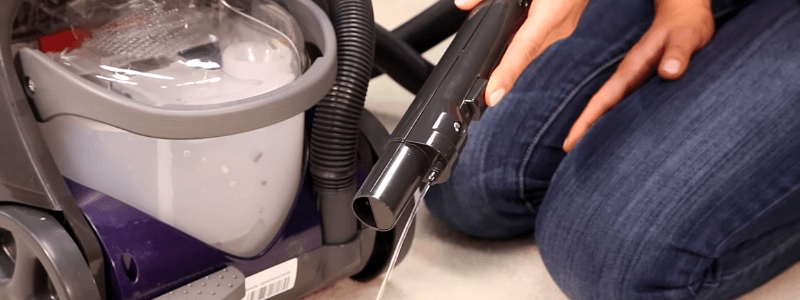
- Unwrap the hose from the back of the ProHeat 2X base and release the hose latch.
- Remove the tools from the tool caddy on the back of the unit.

How to clean a Bissell Pro heat carpet cleaner?
- Turn off your ProHeat. ...
- Remove the "2-in-1" water tank by grasping the handle and pulling it from the cleaner's base. ...
- Detach the red lint screen from the tank lid. ...
- Pull the nozzle handle and remove the nozzle from the front of the unit. ...
- Pull any hair, lint or other debris from the brush roll with your hand or a soft-bristled brush. ...
Which is the best Bissell carpet cleaner?
Name
- Bissell Pet Hair Eraser Upright Bagless Vacuum Cleaner LED-lit crevice tools $$$ 4.8
- BISSELL AirRam Cordless Stick Vacuum Cleaner with Lithium Ion battery, 1984 22V Lithium Ion battery for 30 minutes $$$ 4.8
- Bissell 20431 Powerglide Lift Off Pet Plus Upright Bagless Vacuum On/off brush $$$ 4.7
How to troubleshoot a Bissell ProHeat?
Bissell proheat pet not picking up water. Use the energy of temperature and enjoy a strong clean with the Bissell Proheat. There are a number of ways to troubleshoot vacuum suction trouble to get your machine working properly again. Switch off and unplug it from the wall, before the start of troubleshooting.
How to repair clogged lines in a Bissell ProHeat?
How to Remove a Hose on a Bissell ProHeat
- Turn off the machine and unplug it from the electrical outlet.
- Unlatch the hose from the machine by turning the hose secure latch upward.
- Unwrap the hose from the hose rack.
- Grasp the hose at the base firmly and twist it back and forth while pulling it out of the unit. ...
How do you take apart a Bissell Proheat Powerbrush?
Set the carpet cleaner down on its side with the power cord facing down. Unscrew the black screws and lift off the clear cap on the end. Remove the silver screw and pull up on the pivoting arm to remove. Pull out the brush belt and remove the brush rolls off the metal rods.
How do you unclog a Bissell Proheat carpet cleaner?
1:031:44BISSELL Proheat 2X Revolution Suction Troubleshooting - YouTubeYouTubeStart of suggested clipEnd of suggested clipClean until free of pet hair or debris. Return the nozzle back to the foot of the machine. Line upMoreClean until free of pet hair or debris. Return the nozzle back to the foot of the machine. Line up the three hooks on the nozzle to the bottom of the foot. Rotate.
How do you remove the brush cover on a Bissell Proheat pet?
0:082:56How to change the Belts and Brush Roll on ProHeat 2X® Revolution ...YouTubeStart of suggested clipEnd of suggested clipSlide the wheel down to remove. It remove the screw to remove the brushroll end cap.MoreSlide the wheel down to remove. It remove the screw to remove the brushroll end cap.
How do you open a Bissell?
0:081:15Proheat 2X Revolution Deep Cleaner - Disassembly Video - YouTubeYouTubeStart of suggested clipEnd of suggested clipUse the phillips head screwdriver to remove the screw from the carry handle on the back of theMoreUse the phillips head screwdriver to remove the screw from the carry handle on the back of the machine. Then from each side of the machine pull the carry handle towards you to pop it off the machine.
How do you take apart a Bissell ProHeat 2X revolution?
0:151:03How to Disassemble your ProHeat 2X® Revolution™ Pet Pro - YouTubeYouTubeStart of suggested clipEnd of suggested clipUsing your thumb as leverage. Pull outward at each side of the carry handle to remove. Next use aMoreUsing your thumb as leverage. Pull outward at each side of the carry handle to remove. Next use a flathead screwdriver to pry up both sides of the plastic collar at the base of the handle.
How do you fix a Bissell ProHeat that won't spray?
1:081:47Bissell Carpet Cleaner Won't Spray. Easy Repair - YouTubeYouTubeStart of suggested clipEnd of suggested clipIt's got that spot there where the valve is. When I said in there now that screw pushes in theMoreIt's got that spot there where the valve is. When I said in there now that screw pushes in the bottom that valve and voila. I have water hope it works for you thanks.
How do you remove the brush from a Bissell?
Make sure your machine is turned off and unplugged from an outlet. Grab the front of the brush roll window and pull upward to remove it. Remove the brush roll by grabbing the brush roll tab, and pulling up. To clean both the brush roll and brush roll window, rinse each under warm water.
How do you remove the brush roll cover on a Bissell Proheat 2x?
0:041:13How to clean the Nozzle and Brushroll on the ProHeat 2X® Revolution ...YouTubeStart of suggested clipEnd of suggested clipPull up on the accessory hose door located on the top of the foot to remove the brushroll coverMorePull up on the accessory hose door located on the top of the foot to remove the brushroll cover press the to release buttons. And lift straight up.
How do you remove the brush from a Bissell revolution carpet cleaner?
More videos on YouTubeTo clean the nozzle, start by turning off and unplugging the machine.To remove the nozzle, pull up on the accessory hose door located on the top of the foot.To remove the brushroll cover, press the two release buttons and lift straight up.More items...
How do you disassemble a carpet cleaner?
How to Disassemble Your Carpet Cleaner Like a ProRemove both the water and recovery water tank. First, pull to lift and remove the water tank on top. ... Unwrap and release the hose from the back. ... Remove the tools. ... Remove the lower hose rack. ... Unscrew the nozzle. ... Remove the clear cap. ... Remove the pivoting arm.
How do you open a Bissell carpet cleaner tank?
0:141:15How to fill Clean Water Tank on ProHeat 2X® Revolution™ Pet ProYouTubeStart of suggested clipEnd of suggested clipIf you are planning to use deep clean mode there is a fill line at the top of the tank. If you areMoreIf you are planning to use deep clean mode there is a fill line at the top of the tank. If you are using antibacterial formula with easy filled twist. The cap back on to the tank.
How do you put a Bissell ProHeat back together?
0:532:44How to change the Belt on Proheat 2X Revolution | BISSELL - YouTubeYouTubeStart of suggested clipEnd of suggested clipRemove the plate to expose the valve remove the brush cover by lifting it up then lift the belt toMoreRemove the plate to expose the valve remove the brush cover by lifting it up then lift the belt to remove. The brush rolls can be gently removed and replaced with new brush. Rolls.
Why would you need to take apart a Bissell ProHeat carpet cleaner?
You may need to take your carpet cleaner apart for many reasons. I have stated some of the common ones below.
Step by step instructions on how you can take apart a Bissell ProHeat carpet cleaner
The process for taking apart is the same for all models of the cleaner. So whether you have a Bissell ProHeat 2x Revolution or a Bissell ProHeat 2x Revolution Pet Pro, the process will be the same.
Some common cleaning tips for your Bissell ProHeat carpet cleaner
After opening your carpet cleaner, do not forget to clean all of these spare parts thoroughly. This will help your appliance last longer and serve you more. Moreover, after all of the spare parts are cleaned, the cleaner’s performance will again be like a new one. Hence it is recommended to clean Bissell carpet cleaner regularly.
Conclusion
By now, I hope you have understood how you can take apart a Bissell ProHeat carpet cleaner. The process is relatively seamless and essential. The only mandatory tool you need is a screwdriver. With that in your grasp, you can start the process of taking the carpet cleaner apart.
How To Take Apart a Bissell Carpet Cleaner
Bissell carpet cleaners are one of the nicest cleaners accessible today. They are more significant as compared to regular vacuum cleaners. They eliminate everything on the carpet. They can clean those areas and smudges and suck dirt that ordinary vacuum cleaners cannot clean. These movable and strong cleaners give a deep cleaning to the carpet.
BISSELL CARPET CLEANER
This device is best to clean heavy pet stains. It offers a Deep Clean Mode for powerful. This cleaning strength arrives in a lightweight and portable machine. It also includes a low-profile foot that gets inside furniture. Basically, you have everything you need to clean heavy pet stains.
Reasons to Take Apart Your Bissell ProHeat Carpet Cleaner
There are several reasons you may want to take apart your Bissell Pro Heat or Bissell ProHeat 2x Revolution.
Getting Prepared
Before you start disassembling your ProHeat carpet cleaner, whether it is the Original or the ProHeat 2x Revolution, there are a couple of things you should do to make sure the process goes off without a hitch.
How to Disassemble Your Carpet Cleaner Like a Pro
First, pull to lift and remove the water tank on top. Then, hold the handle while you press the latch allowing you to unlock and pull out the recovery water tank below as well.
Other Things to Consider
Now that you already know how to take apart a Bissell ProHeat carpet cleaner, regardless of whether you find the problem that prompted you to take apart your Original ProHeat or ProHeat 2x Revolution, we recommend taking advantage of the situation and making sure you clean and rinse each part.
Conclusion
Now that our guide has come to an end, we hope you know how to take apart a Bissell ProHeat carpet cleaner. With this information, you may be able to save yourself some time and lessen your expenses when it comes to routine maintenance and minor repairs in the future.