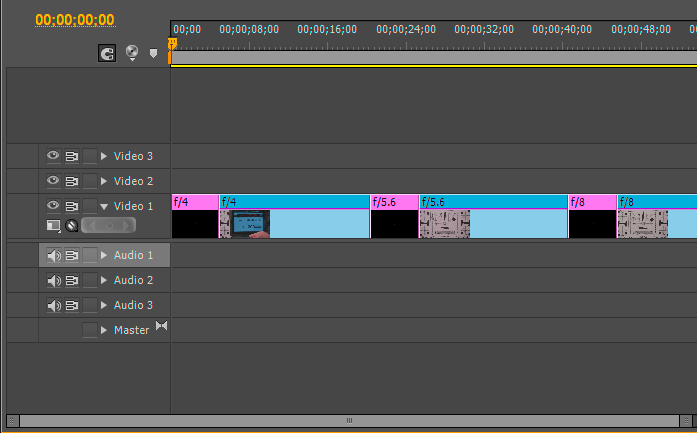
Set keyframe display for a Timeline panel
- Select Edit > Preferences > > General (Windows), or Premiere Pro > Preferences > General (Mac OS).
- Click the triangle in the New Timeline Audio Tracks field to open the menu, and select one of the options.
- Click the triangle in the New Timeline Video Tracks field to open the menu, and select one of the options.
How do you insert a keyframe?
- Set your work area start and end points to the section of the composition you wish to loop.
- Create a new composition (Command N) and keep your settings the same as the original composition.
- Now, in the new composition, go to the Menu bar and select Layer > Time > Enable Time Remapping.
How to create Square Video in premiere?
On my computer this is:
- Windows (C:) drive
- Program Files
- Adobe
- Adobe Premiere Elements 2018 (or whatever version you have)
- Settings
- SequencePresets
- NTSC
- AVCHD
How to create motion blur effect in Premiere Pro cc?
Method 2: Using Direction Blur
- Search Directional blur in the Effect search panel.
- Drag that on to the video selected in the timeline.
- Go to Effect Controls, change the parameters from the Directional Blur effect.
- Adjust the Direction and Blur Length to check the effect you like.
How to create a typing effect in Premiere Pro cc?
How to Create a Typewriter Effect in Adobe Premiere Pro CC (2018)
- Create a new sequence and drag in whatever footage you want to use.
- Go to the text tool, click once to create a new textbox. ...
- Click on the graphics file that was created, up to effect controls, and then down to your text layer.
- Then go down to source text and click on the little stop watch to begin an animation.
How do you show keyframes?
Display keyframes in the Timeline track area In the upper-right corner of the Timeline in Motion, click the Show/Hide Keyframes button.
How do I show Effects tab in Premiere Pro?
Choose Window > Workspace > Effects. By default, the timeline view is hidden, but you can show it by clicking the Show/Hide Timeline View button . Widen the Effect Controls panel, if necessary, to activate this button.
Why can't I see the effects panel in Premiere Pro?
if The Effects panel is accidentally closed you can go to the top of the interface then go to window/Effects. This should re-open it. if The Effects panel is accidentally closed you can go to the top of the interface then go to window/Effects. This should re-open it.
Why can't I see effects in Premiere Pro?
0:001:23Why Effect Controls is not showing anything in Premiere Pro (Basic ...YouTubeStart of suggested clipEnd of suggested clipAnd if it's still not visible then you have to click on the clip. Itself that one then it should beMoreAnd if it's still not visible then you have to click on the clip. Itself that one then it should be visible.
How To Add Keyframes in Premiere Pro
To add keyframes in premiere pro, Go to the Effects Controls panel then click the Toggle Animation Panel which will then activate the keyframing pr...
How To Add Keyframes to Audio in Premiere Pro
To add keyframes to audio in Premiere Pro, Right-click on your working area then select “Show Audio Keyframes” from the context menu. Alternatively...
Why Can’t I add a Keyframe in Premiere Pro?
If you can't add keyframe in Premiere Pro, Right-click the FX icon then choose the parameter you want to use for the keyframes if you can't add a k...
What’s the Shortcut for Adding/Removing Keyframes?
If you are using a windows device, Ctrl-click, and if you are a Mac user, Command-click a keyframe using the pen tool or selection tool. Afterward,...
How to make a keyframe in a clip?
To create keyframes in a track or on a clip, it is not necessary to enable keyframe display. In a Timeline panel , select the clip that contains the effect you want to animate. If you want to add and adjust keyframes in a Timeline panel , make keyframes visible for the video or audio track.
How to animate a property in Premiere Pro?
To animate a property is to change its value over time. In Premiere Pro, effect properties can be animated by assigning keyframes to them. A keyframe marks the point in time where you specify a value, such as spatial position, opacity, or audio volume. To create a change in a property over time, you set at least two keyframes—one keyframe for ...
How to edit keyframe graphs?
Edit keyframe graphs from a Timeline panel. Make sure a Timeline panel has at least one clip containing one or more effects with keyframes. Select this clip and select the Effect Controls panel. Make sure that the keyframes for the clip or track are visible in a Timeline panel.
How to select multiple keyframes in a timeline?
To select a keyframe, use the Selection tool or the Pen tool to click the Keyframe icon in the Timeline panel. To select multiple keyframes, Shift-click with the Selection tool or the Pen tool to select multiple contiguous or noncontiguous keyframes in a Timeline panel. Note:
What is a timeline panel?
For video and audio effects, a Timeline panel can display the keyframes specific to each clip. For audio effects, a Timeline panel can also display the keyframes for an entire track. Each clip or track can display a different property.
How do the effects panel work?
The Effect Controls panel and Timeline panels let you adjust the timing and values of keyframes, but they work in different ways. The Effect Controls panel displays all effect properties , keyframes, and interpolation methods at once. Clips in a Timeline panel show only one effect property at a time. In the Effect Controls panel, you have complete control over keyframe values. In a Timeline panel, you have limited control. For example, you can’t change values that use x and y coordinates, such as Position, in a Timeline. However, you can make keyframe adjustments without moving to the Effect Controls panel.
What is the effect menu in a video?
Displays the graph and keyframes of any video effect applied to clips in the track. An effect menu appears next to the clip name so you can choose the effect you want to view.
When to use keyframes in Premiere?
Keyframes are best used when you want to animate an effect in a certain way. Premiere allows you to edit nearly every aspect of an effect’s properties, so if you want a transition to be smoother and longer, or you want your video distortion to behave a certain way, keyframes let you do this. Make sure you have in mind exactly how you want ...
How many keyframes do you need for a transition?
Keyframes are then essentially points in time that you set for these changes to occur. So, you need at least two keyframes for this to happen.
What is the dropdown in video effects?
When you select a clip, you will see a dropdown called Video Effects. These will be attributes to the chosen clip, such as position or scale. You’ll also see the effects you’ve applied to the clip in a dropdown. Depending on the effect, there will be different properties you’ll have the ability to change.
Can you add a keyframe in a timeline?
There are multiple ways you can now create keyframes. If you move to a new spot on the timeline and make any change to the Wave Height value, a keyframe will be added.
Can you add multiple start and end points in keyframes?
However, keyframes give you the ability to add as many points in between as you want. This means you can edit the properties of effects as precisely as you wish. You can create multiple start and end points to change how the effect or transition is animated in your project. These properties include things such as position, scale, opacity, ...
Does Adobe Premiere have keyframes?
Adobe Premiere, however, has a wide range of features available to edit your video just the way you want it. Keyframes are one of these features that can allow you to get more precise and varied edits.